
Push and Pull Train STEM Lesson for Kindergarten: Pushes, Pulls and a Ramp Design
A free, 40-minute kindergarten science lesson where children push and pull a toy train to see how strength and direction change its motion. They hear Rally Takes the Train, learn how real engines are turned, then design a bumper or ramp that steers the train toward a station. Includes recording sheets and a family note.
- Grade
- Kindergarten
- Subjects
- Physical science, Engineering design
- Time
- 40 minutes (or two 20-minute blocks: investigate one day, design the next)
- Prep
- 10 minutes: tape a start line and a paper 'station' on the floor, tie a string no longer than 12 inches to one toy train per group, print one push-pull sheet per child and one design sheet per group
- Grouping
- Whole group, then small groups of 3 or 4
- Book pages
- 8, 14
- NGSS K-PS2-1
- NGSS K-PS2-2
 Need the book? Get the paperback on Amazon (opens in a new tab) or earn a free classroom copy.
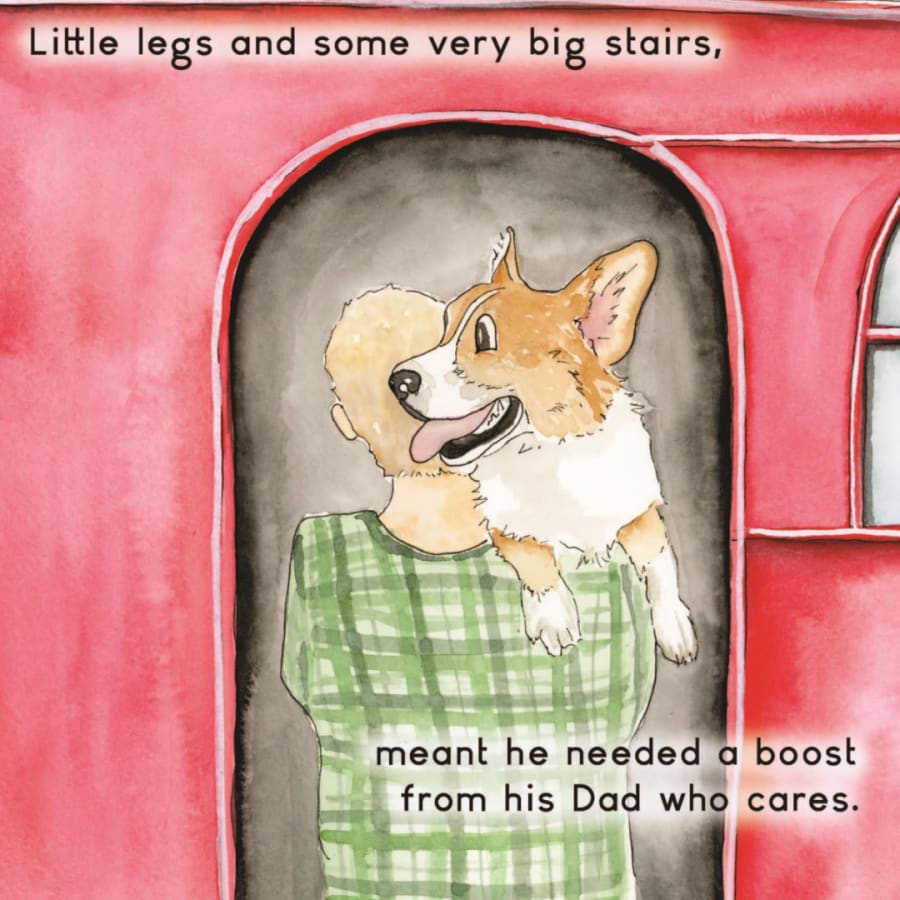
Learning objective
Students compare how gentle and hard pushes, pushes in different directions, and pulls change a toy train's motion, then test a bumper or ramp and use what they saw to decide if it changed the train's direction or speed.
I can push and pull a train to make it go far, go slow or change direction, and I can tell if my design worked.
Vocabulary to teach
Materials
- Rally Takes the Train by Kelsey Lizee Cecil: get the paperback on Amazon (opens in a new tab) or earn a free classroom copy
- One toy train car per group (any rolling train or toy car), with a string no longer than 12 inches tied to the front
- Masking tape for a start line on the floor and a paper 'station' sign taped to the side, off the straight path
- Building materials per group: blocks, a few hardcover picture books, a piece of cardboard or a file folder
- Push-pull sheet, one per child (printable): three picture rows (gentle push, hard push, pull with string), each with a train at a start line and three boxes to color: near, middle, far; a bottom row with four direction arrows to circle
- Design sheet, one per group (printable): a box to draw the plan, a box to draw the test, and a 'Did it work?' row with a smiley face and a frowny face to circle; page 14 crossing art in the corner
- Screen or printout of the Steamtown National Historic Site guide (see Discover)
Lesson steps
Hold up the cover. "Today we are scientists. Trains move, speed up, slow down and turn. Something has to push or pull them to make that happen. A push moves something away from you. A pull moves something toward you. Listen for when Rally's train starts moving and when it slows down."
"Choo choo! The train is starting. Was the train still, or was it moving? What do you think made it start to move?" (It was still, then it started moving. The engine pulled or pushed it.)
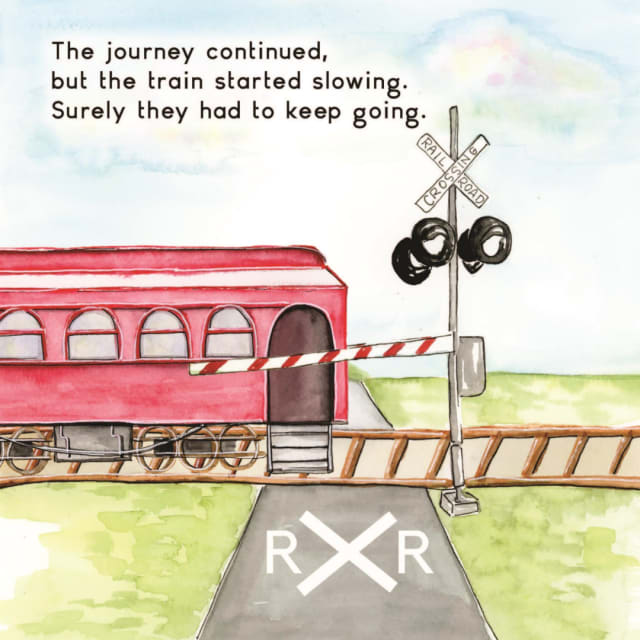
"The train started slowing. What does slowing mean?" (Going less fast.) "The train is slowing down because it is getting close to the station. Look at the gate and the lights. Trains are big and heavy and need a long way to stop, so the gate tells cars and people to stop and wait."
Point to the track. "Which way is the train going? Show me with your arm." Then ask: "If we wanted the train to turn a different way, what would have to push or pull it?" (Accept ideas; tell children they will test this today.)
- Gather in a circle around the start line. Model with one toy train: "I will give it a gentle push." Push softly. "Now a hard push." Ask: "Which one went farther?" Mark both stopping spots with tape.
- Push the train straight, then from the side, then backward. "When I push from a different side, which way does it go?" Children point to show the direction each time.
- Pull the train with the string toward you. "Is this a push or a pull? How do you know?" (It is coming toward me.)
- Groups take turns at the start line: one gentle push, one hard push and one pull. Each child colors the near, middle or far box on the push-pull sheet to show where the train stopped, and circles the arrow that shows which way it went.
- Stand up and be the engine: pull an imaginary line of train cars across the rug, then sit. Open the Steamtown National Historic Site guide (Scranton, Pennsylvania), or find a verified museum near your school in the field trip planner (rallytakesthetrain.com/lessons/train-museum-field-trips). Read two or three sentences aloud and show the photos.
- "An engine is the strong part of the train. It pulls a long line of train cars behind it." Ask: "Is the engine pushing or pulling the cars?" (Pulling.)
- "This museum has a working turntable. It is a big circle of track that spins to turn a giant engine so it faces a new direction." Ask: "Why would a train need to change direction?" Then say: "Today you will build something that changes the direction of our toy train, too."
Or find a verified museum near your school in the field trip planner.
- State the problem: "Our train goes straight, but the station is over to the side. Can your group build a bumper or a ramp that turns the train toward the station or changes its speed?" Show the materials: blocks, books, cardboard.
- Groups draw a quick plan in the first box of the design sheet, then build. Remind them: "The push from the start line stays the same. Only your design changes."
- Each group tests three times and draws what happened in the test box. Ask: "Where did the train go? Did it turn, slow down or speed up?"
- Groups circle the smiley or frowny face and tell the class: "Our design worked because the train ___" or "It did not work because ___. Next time we will ___."
Safety: Real train tracks are only for trains. Teach children to stay off tracks, to stay behind the gate when the lights flash at a crossing like the one on page 14, and to hold a grown-up's hand near a station. In class, keep strings no longer than 12 inches and never around a neck or wrist, roll trains on the floor only, keep ramps low (no higher than a child's knee) and steady, and keep the testing lane clear of feet. Children walk, not run, to get the train. If any child still mouths small objects, use toy vehicles too big to fit through a toilet paper tube opening.
Differentiation
Extra support
Offer a ready-made bumper (a book standing at an angle) and let the child move it to see how the train turns. Use only two push strengths and the words near and far. A child with motor needs can push with a flat hand or a ruler, or mark the stopping spot with tape as the group's recorder.
Multilingual learners
Act out push and pull with your whole body before using the words, and post picture cards for push, pull, fast and slow in English and the home language. Give the frame "The train went ___." Pair with a peer who shares the home language when possible. Key language use: Explain.
Extension
Challenge the group to design for two goals: turn the train toward the station and make it stop on the station sign. Ask them to compare two designs and tell which worked better and how they know.
Check for understanding
Success criterion: Compares the effects of different pushes and pulls and uses test results to decide if a design changed the train's direction or speed.
| Level | What you see |
|---|---|
| 3Meets (level 3) | Tells how a hard push and a gentle push differ, shows direction with arrows, and uses what the train did in the test to explain if the design worked. |
| 2Approaching (level 2) | Compares push strengths or directions correctly, but explains the design result only with a prompt such as "Where did the train go?" |
| 1Beginning (level 1) | Pushes and pulls the train but does not yet compare results or connect the test to whether the design worked. |
Family connection
Send home the half-page note in the printables. The text is below so you can paste it into a newsletter or app.
English
Today your child was a scientist and an engineer. We pushed and pulled a toy train to see that a hard push makes it go farther, a gentle push makes it go a short way, and pushing from a different side changes its direction. Then small groups built a ramp or bumper to turn the train toward a pretend station. At home, roll a ball or toy car with a gentle push and a hard push and ask, "Which went farther? Why?" Free Rally coloring pages are at rallytakesthetrain.com/coloring-pages.
Español
Hoy su hijo o hija hizo ciencia e ingeniería. Empujamos y jalamos un tren de juguete y vimos que un empujón fuerte lo hace llegar más lejos, un empujón suave lo mueve poco, y empujar desde otro lado cambia su dirección. Luego, en grupos pequeños, construimos una rampa o barrera para girar el tren hacia una estación de papel. En casa, rueden una pelota o un carrito con un empujón suave y uno fuerte y pregunte: "¿Cuál llegó más lejos? ¿Por qué?" Hay páginas para colorear gratis de Rally en rallytakesthetrain.com/coloring-pages.
Teacher tips
- Choose one child to be the "pusher" for every test in a group's design round. Keeping the push the same makes it much easier for children to see that the design, not the push, changed the train.
- Mark where the train stops with small pieces of tape and a group color. Children compare far and near by looking at the floor instead of remembering.
- Expect the first design to fail. Say "Engineers test and try again" out loud, and give every group time for one change and one more test.
Standards alignment
| Standard | Text |
|---|---|
| NGSS K-PS2-1 (opens in a new tab) | Plan and conduct an investigation to compare the effects of different strengths or different directions of pushes and pulls on the motion of an object. |
| NGSS K-PS2-2 (opens in a new tab) | Analyze data to determine if a design solution works as intended to change the speed or direction of an object with a push or a pull. |
Check codes against your state's version of these standards. How we build and review lessons.
Keep exploring
Find an engine in a museum guide. Does the engine push the cars or pull them? How can you tell?
After the lesson, children can explore about 650 train and railway museums through our free guides, discovering the history, engineering and stories behind real trains. Read one together, then come back to the question.
Teach it with the real book
4.9 stars on Amazon
Rally Takes the Train is a rhyming, hand-painted picture book about a corgi's first train ride, from the big station stairs to a dark tunnel to the people waiting at the end of the line. Children ask for it again and again, and every lesson here is built on its pages.
Questions teachers ask
How do you teach push and pull in kindergarten?
Let children feel and see it. Model a gentle push and a hard push on a toy train, mark where it stops, then push from different sides and pull with a string. Children say whether each motion moved away (push) or toward them (pull) and record near, middle or far on a picture sheet. Comparing tape marks on the floor makes the idea concrete.
What is a simple K-PS2-2 design challenge?
Give small groups a toy train, blocks, books and cardboard, and a problem: the train must turn toward a station off to the side. Groups build a bumper or ramp, test it with the same push three times, and use what the train did to decide if the design worked. That decision from observations is what K-PS2-2 asks for.
What materials do I need for a kindergarten ramp activity?
Very little. A toy train or toy car for each group, a string, masking tape, wooden blocks, a few hardcover books and a piece of cardboard or a file folder are enough. Add the printable push-pull sheet and design sheet so children can record results with pictures. Most of it is already in a kindergarten classroom.
What is the difference between a push and a pull for kindergarteners?
A push moves something away from you, and a pull moves something toward you. Both can start, stop, speed up, slow down or turn an object. In this lesson children push a toy train away from the start line, then pull it toward them with a string, and say which one it was and how they know from the way it moved.
How do you teach the engineering design process in kindergarten?
Keep it to four moves: state a problem, draw a plan, build and test, then decide if it worked. In this lesson the problem is a station off to the side of a straight path. Groups draw a plan, build a bumper or ramp from blocks, books and cardboard, test it three times, and circle a smiley or frowny face to say whether it worked.
How do you make a kindergarten science test fair?
Change only one thing at a time. During the design round, choose one child in each group to be the pusher for every test and keep the push from the start line the same. Then the design is the only thing that changes, so children can see that it, not the push, changed the train. Marking stopping points with tape makes results easy to compare.
What should kindergarteners do when their design does not work?
Treat it as the next step, not a mistake. Expect the first design to fail, say out loud that engineers test and try again, and give every group time for one change and one more test. In this lesson groups finish with the frame It did not work because ___, next time we will ___, which turns a failed test into a plan.
How do you show kindergarteners that a harder push makes something go farther?
Let them compare and mark the results. Give a toy train a gentle push and mark where it stops with tape, then a hard push and mark again. Ask which went farther. Then push from the side and from behind to show that direction changes too. This kind of comparison is what NGSS K-PS2-1 asks kindergarteners to plan and investigate.
How long does this push and pull lesson take?
About 40 minutes. You can split it into two 20-minute blocks: the read-aloud and push-pull investigation on day one, and the museum connection and design challenge on day two. Splitting it gives groups more time to rebuild and retest, which is the heart of the engineering part.
What standards does the push and pull train lesson meet?
Comparing how gentle and hard pushes, pushes in different directions and pulls change a toy train's motion meets NGSS K-PS2-1. Building a bumper or ramp and using test results to decide whether it changed the train's speed or direction meets NGSS K-PS2-2. Both are listed in this lesson with their full text so you can copy them into your plans.
How do I set up the push and pull investigation?
Plan about 10 minutes. Tape a start line on the floor and tape a paper station sign off to the side, away from the straight path. Tie a string no longer than 12 inches to the front of one toy train per group, and print one push-pull sheet per child and one design sheet per group. Any rolling toy train or toy car works.
What printables come with the push and pull lesson?
The push-pull sheet has three picture rows, gentle push, hard push and pull with a string, with near, middle and far boxes to record results, plus direction arrows to circle. The design sheet has a plan box, a test box and a smiley or frowny face to circle. Both come in color, ink-saver and A4, free with no account needed for classroom and homeschool use.
How do I support kindergarteners in a push and pull lesson?
Simplify the choices. Offer a ready-made bumper, such as a book standing at an angle, and let the child move it to see how the train turns. Use only two push strengths and the words near and far. Pointing to where the train stopped and drawing it on the sheet counts as recording, so every child can take part.
How do I teach force and motion words to multilingual learners?
Act out push and pull with your whole body before using the words, and post picture cards for push, pull, fast and slow in English and the home language. Give the frame The train went ___ and pair the child with a peer who shares the home language when possible. The WIDA key language use for this lesson is Explain.
Can I use the push and pull lesson with TK, mixed ages or 1st grade?
Yes. For TK or mixed ages, use two push strengths, a ready-made book bumper and the words near and far. For 1st grade or advanced kindergarteners, set two goals: turn the train toward the station and make it stop on the station sign. Ask the group to compare two designs and explain which worked better and how they know.
How do you assess a kindergarten push and pull lesson?
Look at the sheets and listen to the group's report. Meets means the child tells how a hard and a gentle push differ, shows direction with arrows, and uses what the train did in the test to explain if the design worked. Approaching means correct comparisons but a prompted explanation. Beginning means pushing and pulling without yet comparing results or connecting the test to the design.
What train safety should I teach in a push and pull lesson?
Teach that real train tracks are only for trains. Children stay off tracks, stay behind the gate when the lights flash at a crossing like the one on page 14, and hold a grown-up's hand near a station. In class, keep strings no longer than 12 inches and never around a neck or wrist, keep ramps low and steady, roll trains on the floor only, and keep the testing lane clear of feet.
Is there a Spanish family note for the push and pull lesson?
Yes. The family note is in English and Spanish, as a half-page printable and as text you can paste into a newsletter or app. It explains that a hard push makes the train go farther and that pushing from a different side changes direction. The 5-minute home idea: roll a ball or toy car with a gentle push and a hard push and ask which went farther and why.
What can children explore after the push and pull lesson?
In Discover, children learn from the Steamtown National Historic Site guide, a verified museum, that a working turntable spins to turn a giant engine so it faces a new direction. Then they design their own way to change a toy train's direction. The Keep exploring section at the end of the lesson links to about 650 free train museum guides at rallytakesthetrain.com/train-museums, so children can look for engines pulling long lines of cars and wonder what makes each one move.
Can I teach the push and pull lesson without the book?
Yes. The investigation and design challenge need only a toy train, tape, string and building materials, so the science works without the read-aloud. The book adds two stops: page 8, where the train starts moving, and page 14, where it slows down near the station. It is in paperback on Amazon, and credentialed Pre-K to 2nd grade teachers in the US can get a free paperback classroom copy by reviewing one lesson plan at rallytakesthetrain.com/free-book-for-teachers.
Related lessons
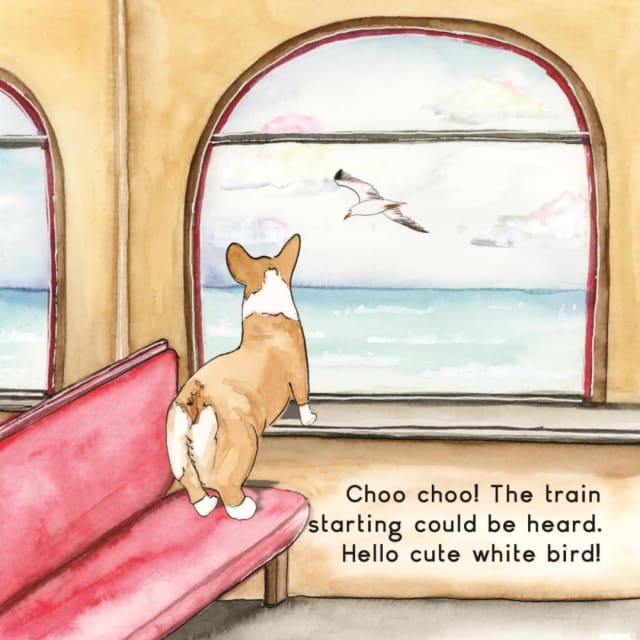
Ramp Races: What Makes a Train Go?
A free, 30-minute preschool and Pre-K/TK science lesson where children find out what makes a toy train go.
Map Rally's Journey: Position Words
A free, 40-minute kindergarten lesson on position words and simple maps.
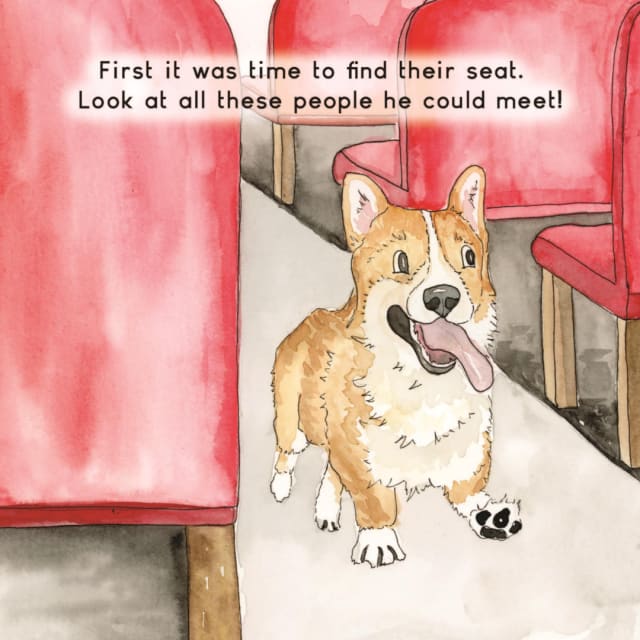
Counting Train Cars: Count and Compare to 20
A free, 40-minute kindergarten math lesson built on a train picture book.
Teaching with Rally Takes the Train
Every lesson is free for classroom and homeschool use. Add the paperback to your classroom library, or review a lesson to earn a free copy if you are a credentialed teacher. Keep the journey going in about 650 free train museum guides, plan a visit with the field trip planner, or browse all lessons for educators.